Monday, May 30, 2011

Using PowerShell to Remove the "Use a Meeting Workspace" Option from SharePoint Calendars

When creating a calendar item (or updating) this is the dialog you get, with the Use a Meeting Workspace highlighted.

meetingWorkspace

From SharePoint Blues I discovered that if you set the calendar list field to hidden then this option would no longer display. Taking this concept, I created a PowerShell script to set this to hidden on a one off basis.

The script is:

# Script to remove Use a Meeting Workspace from a specific calendar

function RemoveWorkspaceLink ([String]$siteUrl, [String]$calendarName)
{
[system.reflection.assembly]::LoadWithPartialName("Microsoft.Sharepoint") > $null
$site = New-Object Microsoft.SharePoint.SPSite($siteUrl)
if ($site -eq $null)
{
return
}

$web = $site.OpenWeb()
$list = $web.Lists[$calendarName]
if ($list -eq $null)
{
"Invalid list name " + $calendarName
}
else
{
$field = $list.Fields[[Microsoft.SharePoint.SPBuiltInFieldId]::WorkspaceLink]
$field.Hidden = $false
$field.Update()
"Updated " + $calendarName + " on " + $siteUrl
}

# Dispose of the SharePoint objects
if ($web) {$web.Dispose()}
if ($site) {$site.Dispose()}
}

RemoveWorkspaceLink "http://myserver/sites/site1" "Calendar1"
RemoveWorkspaceLink "http://myserver/sites/site2" "Calendar2"

I’ve written this as a function so that you can update multiple calendars at the time. If you saved this as a .ps1 file and then run it, the 2 calendars referenced at the bottom would be updated. Alternatively you could . source the file and use the function interactively, or just hard code the $siteUrl and $calendarName variables each time you run it.

The option is removed immediately you have run the script with no iisreset or application pool recycle required.

So with the script is run this is what you see with the Meeting Workspace option removed:

meetingWorkspaceAfter

This works well for hiding it on individual calendar lists, but doesn’t affect any other existing calendars or ones created afterwards.

Wednesday, May 25, 2011

Configuring RBS for SharePoint 2010

The following posts details configuration of Remote Blob Storage (RBS) for SharePoint 2010 and SQL Server 2008 R2.

First download the RBS provider for SQL Server 2008 (don’t install it yet):

http://go.microsoft.com/fwlink/?LinkId=177388

Configure file stream for the SQL Server Service using the Configuration Manager:

image

Execute the following SQL queries:

EXEC sp_configure filestream_access_level, 2

RECONFIGURE

Execute the following SQL to set up a master encryption key and blob store file group:

use WSS_Content  if not exists (select * from sys.symmetric_keys where name = N'##MS_DatabaseMasterKey##')
create master key encryption by password = N'Admin Key Password !2#4'  if not exists (select groupname from sysfilegroups where 
groupname=N'RBSFilestreamProvider')alter database WSS_Content  add filegroup RBSFilestreamProvider contains filestream  alter database [WSS_Content] add file (name = RBSFilestreamFile, filename = 'c:\Blobstore') 
to filegroup RBSFilestreamProvider

Install the RBS provider with the following command (change DBINSTANCE to your SQL server instance):

msiexec /qn /lvx* rbs_install_log.txt /i RBS_X64.msi TRUSTSERVERCERTIFICATE=true FILEGROUP=PRIMARY DBNAME="WSS_Content" DBINSTANCE="SP2010" FILESTREAMFILEGROUP=RBSFilestreamProvider FILESTREAMSTORENAME=FilestreamProvider_1

If installing RBD on production servers, be sure to run on all WFE’s with the following command (again, change the DBINSTANCE):

msiexec /qn /lvx* rbs_install_log.txt /i RBS_X64.msi DBNAME="WSS_Content" DBINSTANCE="SP2010" ADDLOCAL=”Client,Docs,Maintainer,ServerScript,FilestreamClient,FilestreamServer”

Run the following Power Shell script from the SP2010 Management Console:

$cdb = Get-SPContentDatabase –WebApplication http://sp2010

$rbss = $cdb.RemoteBlobStorageSettings

$rbss.Installed()

$rbss.Enable()

$rbss.SetActiveProviderName($rbss.GetProviderNames()[0])

$rbss

Now create a document library in SharePoint and upload an image to it. Next visit the c:\blobstore directory and look for the GUID sub folder with recent date. Keep drilling down until you find a file. You should see a file with GUID name. Drop this into IE and you should see that it is the same file you uploaded to your document library.

SharePoint 2010 - The Security Token Service is not available

I am in the process of setting up a SharePoint Foundation 2010 machine. After installing SharePoint Foundation 2010 I noticed a warning in the Central Admin > Review problems and solutions report that the Security Token Service is not available.

image

The Security Token Service is not available.
The Security Token Service is not issuing tokens. The service could be malfunctioning or in a bad state.
SPSecurityTokenService (SecurityTokenService)

The problem ended up being that the default configuration of the IIS Application Pools were set to 32-bit:

image

When SharePoint was installed all of the application pool accounts were added with 32-Bit enabled which prevented the SharePoint application pools from starting. I had corrected this for the Central Admin site and also the root SharePoint site but the application pools for the Security Token Service were still set to use the 32-Bit application which was preventing the service from starting.

Changing this setting in each of the application pools (there were several created so check them all) fixed the issue and then the warning went away.

SharePoint 2010 Health Analysis

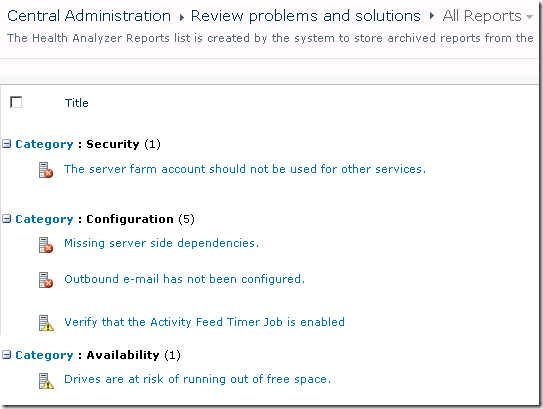
The SharePoint 2010 Health Analyzer is a great way of getting information about the state of your SharePoint farm. It checks things including disk space and database fragmentation and other security, performance and configuration issues. If the health analyzer finds issues you are presented with a message when you browse to the Central Administration site. There is also a link to find out details of all problems that were found.

sp2010-health-critical

To run all the jobs immediately fire up a SharePoint 2010 Management Shell as a farm administrator and drop in the following PowerShell:
$jobs = Get-SPTimerJob | Where {$_.DisplayName -match "Health Analysis Job"}
foreach($job in $jobs) {
  Write-Host "Running" . $job.DisplayName
  $job.RunNow()
}

You should now see any problems appear in the Health Analyzer screen, ready for you to address while you are on site before the client sees an angry red message when they use Central Administration the next day. Note this can take a few seconds to update so check the timer job history or the modified column to ensure the latest results are showing.

sp2010-health-problems

Once you have fixed the issues you can either run the PowerShell again or check the rules individually using the Reanalyze Now button that is displayed within each problem.

clip_image001

As a side note some of the common non-trivial messages are:

Missing server side dependencies.

Explanation: [MissingWebPart] WebPart class [8d6034c4-a416-e535-281a-6b714894e1aa] is referenced [6] times in the database [AdminContentDB], but is not installed on the current farm. Please install any feature/solution which contains this web part. One or more web parts are referenced in the database [AdminContentDB], but are not installed on the current farm. Please install any feature or solution which contains these web parts.

Solution: Following the steps in the article Missing Server Side Dependencies – 8d6034c4-a416-e535-281a-6b714894e1aa to browse to the SearchAdministration.aspx and SearchFarmDashboard.aspx in Central Administration and perform an iisreset seemed to fix the issue for me.

The server farm account should not be used for other services.

Explanation: DOMAIN\spfarm, the account used for the SharePoint timer service and the central administration site, is highly privileged and should not be used for any other services on any machines in the server farm. The following services were found to use this account: User Profile Synchronization Service(Windows Service)

Solution: Unfortunately I don’t have an easy fix for this one (assuming it is referring to the User Profile Service – any other services should not be running as the farm account). Spence and Spence on TechNet both indicate the farm account must be used to run the User Profile Synchronization service application. Changing this to any other managed account seems to break the UPS app so if you know how to avoid this please let me know.

Verify that the Activity Feed Timer Job is enabled

Explanation:The newsfeed displayed on My Site and Profile pages uses the Activity Feed Timer Job. Without this timer job, no newsfeed will be available on My Site and Profile pages. This also applies to any third-party product that uses this newsfeed.

Solution: Start the User Profile Service Application – Activity Feed Job from the Monitoring > Job Definitions page in Central Administration.

NetBIOS Domain Name and Fully Qualified Domain Name don’t match

If the NetBIOS domain name and it’s fully qualified name do not match there is additional configuration necessary. This does not effect provisioning, but it will prevent sync from working. You must do the steps below in the correct order, otherwise you will encounter problems with the SyncDB. Do them in the correct order!

Additional Permissions (Do this first)

  • The Synchronization Connection account must have Replicating Directory Changes on the cn=Configuration naming context. You can also perform this using the Advanced Features view of ADUC if you wish.
    1. Start… Run… ADSIEdit.msc
    2. Connect to the Configuration Partition
      image
    3. Right click the configuration partition and choose properties
    4. From the Security tab, add the Synchronization Connection account and give it Replicating Directory Changes permissions
      image

Configure the User Profile Service Application to support NetBIOS names

  • You do this after creating the service application, but before provisioning the UPS Service Instance.
  • Run the following Windows PowerShell:
    1$upsa = Get-SPServiceApplication –Id $upsa.NetBIOSDomainNamesEnabled=1
    2$upsa.Update()
    3# To get the GUID of the User Profile Service Application run Get-SPServiceApplication.

Now we can go ahead and provision UPS and configure our Synchronization Connections.

[UPDATE]
Note: the December 2010 Cumulative Update breaks this capability and after setting NetBIOSDomainNamesEnabled, you will not be able to create Synchronization Connections. If you need this capability, do not install the December 2010 CU!

This issue is resolved in the February 2011 CU. Once you have applied the CU and then set the property of the UPA, perform an IIS Reset before attempting to create sync connections.

Live@Edu SSO Sharepoint 2010 WebPart and Webservice

Project Description
LiveAtEduSSOLinks is a work around for to offer Single-Sign-On links in Sharepoint to LiveAtEdu accounts.

Its Written in C# for VS 2010 and currently in early beta as it is built off similar projects for Sharepoint 2007 that I found here on Codeplex.

Written by Chris Towles at Northern Kentucky University.

http://www.ChrisTowles.com

For the mean time I've taken down the code and have cleaned it up and rewritten parts of it. Email me if your interested or post on my blog.

Requirements: You must have the Microsoft the Windows LiveID SSO Kit. if you haven't already done this go
to the Live@edu service management portal (http://eduadmin.live.com/), select Single sign-on. Then, click Request SSO Support to request the SSO SDK and certificate.

I've written a install guide for setting up the SSO at http://www.christowles.com/2010/10/install-steps-for-microsoft-liveedu-sso.html

Components: This project contains 2 components, all designed allow single click login from SharePoint 2010 to Microsoft® Live@EDU service.
•A Web Service that requests a token from the Windows Live@EDU service and forms a valid SSO URL.
•A SharePoint 2010 web part to call the web service and redirect the User to the URL.

This project is a extension of the work done at http://liveedusso.codeplex.com

How to configure single sign-on in TMG

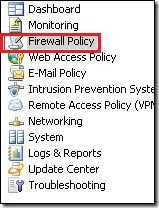
1. In the Forefront TMG Management console, in the tree, click the Firewall Policy node.

FirewallPolicy

2. In the Tasks pane, click the applicable Web publishing rule.

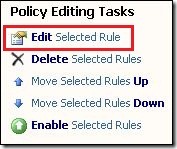
3. On the Tasks tab, click Edit Selected Rule. (or just double-click rule)

PolicyEditing

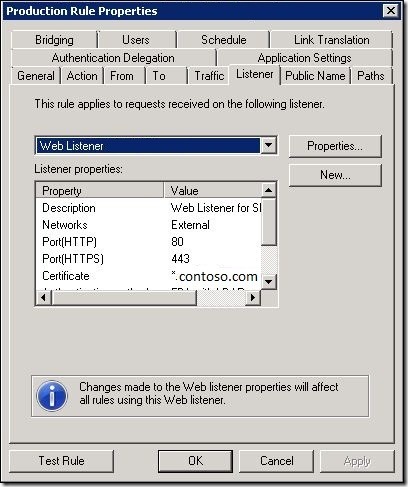
4. On the Listener tab, click Properties.

ListenerTab

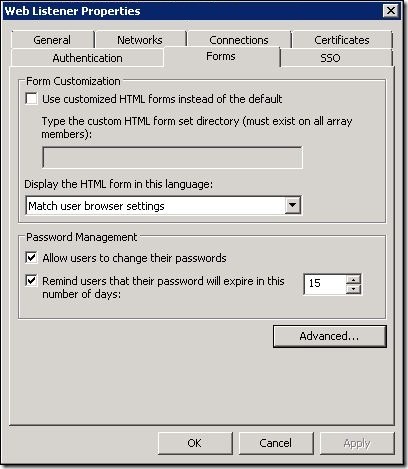
5. On the Authentication tab, verify that Method clients use to authenticate to Forefront TMG is set to HTML Form Authentication.

FormsTab

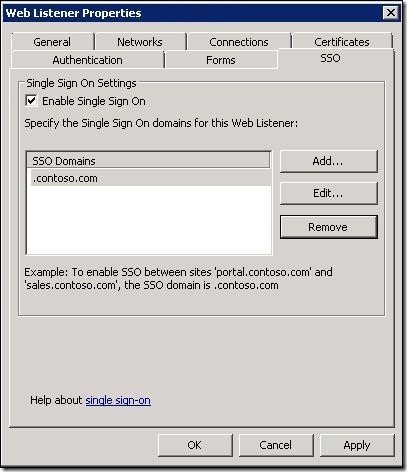
6. On the SSO tab, select Enable Single Sign On.

7. Under Specify the Single Sign On domains for this Web listener, perform the following steps for the Web sites for which you want to allow single sign-on (SSO).

8. Click Add.

9. Type the SSO domain for two or more Web sites.

SSO

10. Click OK.

11. In the details pane, click Apply, and then click OK.

Note (From TMG Help):
With SSO, users can click a link on a Web page supplied by one Web site and move safely to another Web site without having to supply their credentials again.

Single sign-on is available for Web sites that are published by rules that use the same Web listener. The Web listener must be configured to use HTML forms-based authentication, and SSO must be enabled for it.